
Guest contributor: A master class on 3D rendering by Ben O’Bro
Ben O’Bro – Caterham owner, MCB recurring guest contributor, and professional visual artist – created this 3D render of a Lamborghini Countach and Ferrari 512TR from a conventional photograph using 3ds Max and V-ray software. Here, he walks us through how he did it.
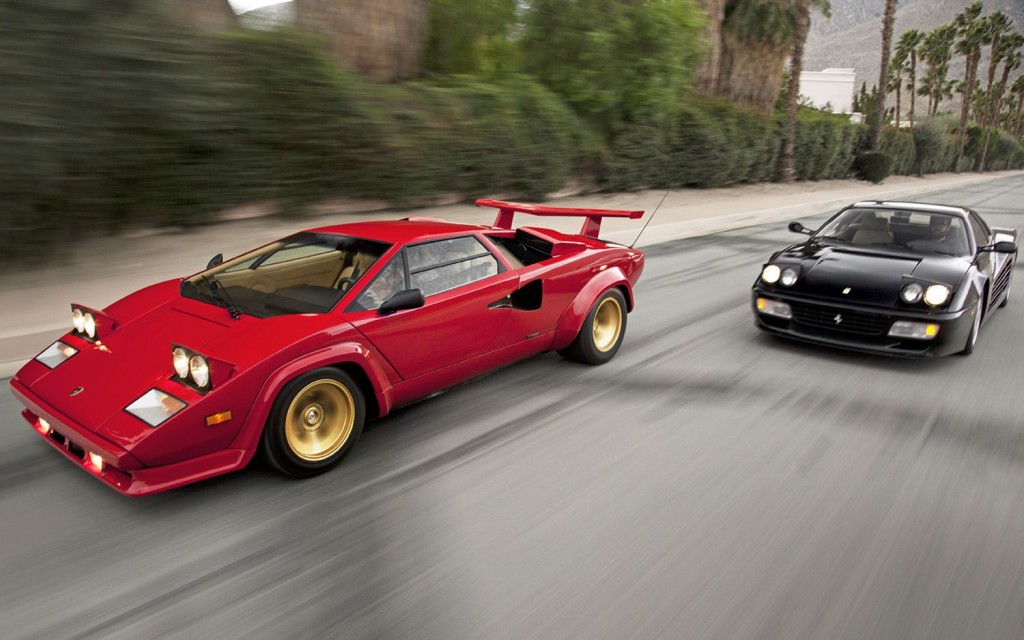
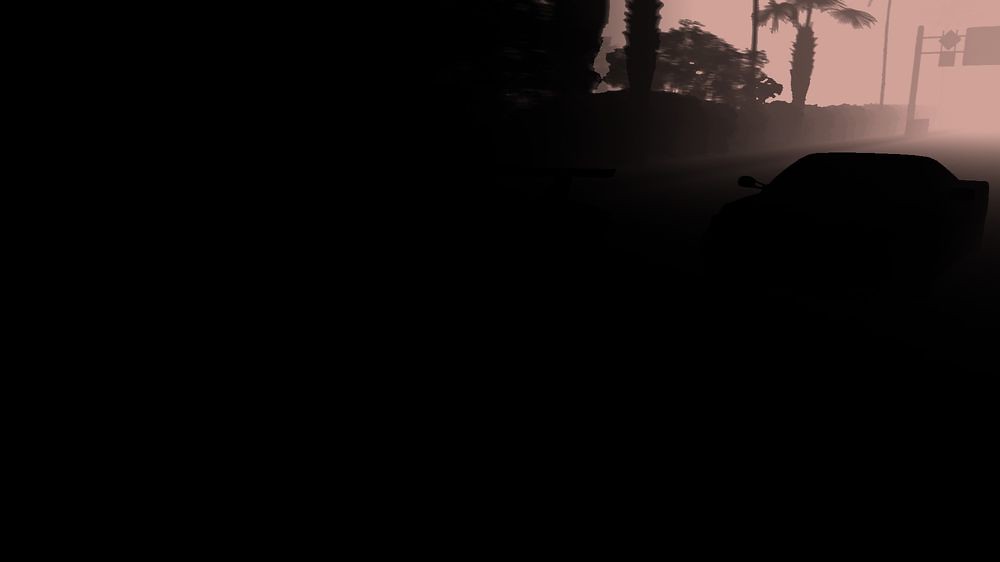
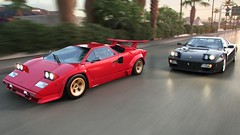
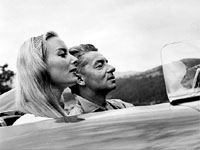
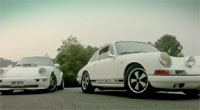
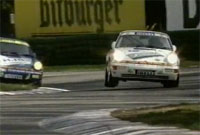
I found my inspiration on the Internet, once again, when I wanted to make an image with a Countach and a 512 and I happened to find this image with the exact two cars I fancy! Then, because I’m not so great at creating something from nothing, I decided to make the same image in 3D, as a challenge to recreate the light mood, as well as the speed effect.
Here is the original image:
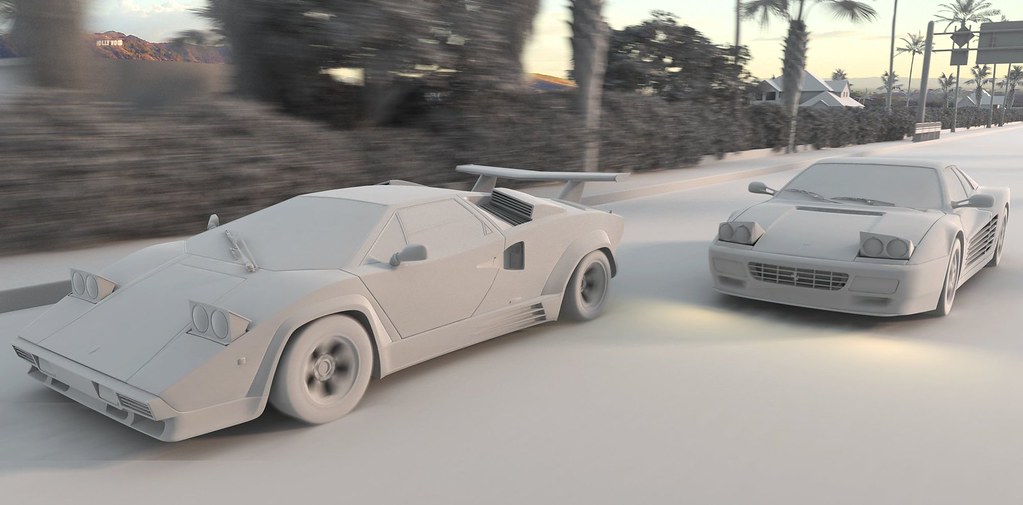
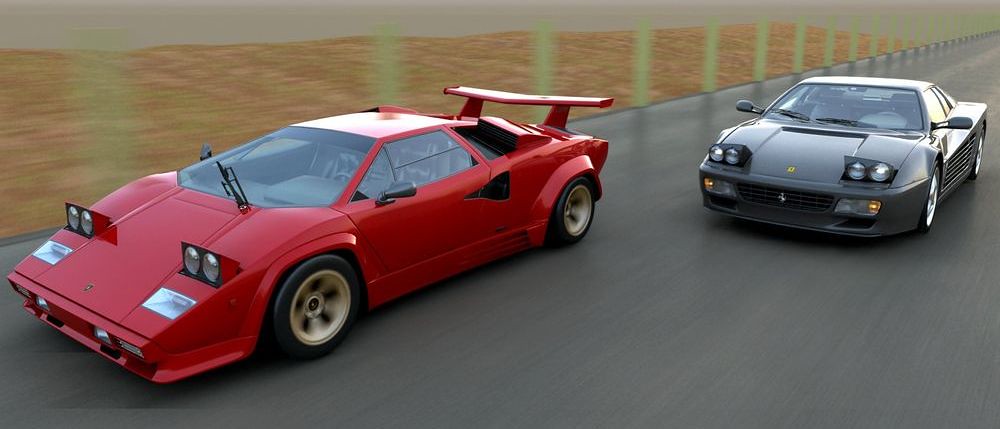
Here is the render without texture, all in gray:
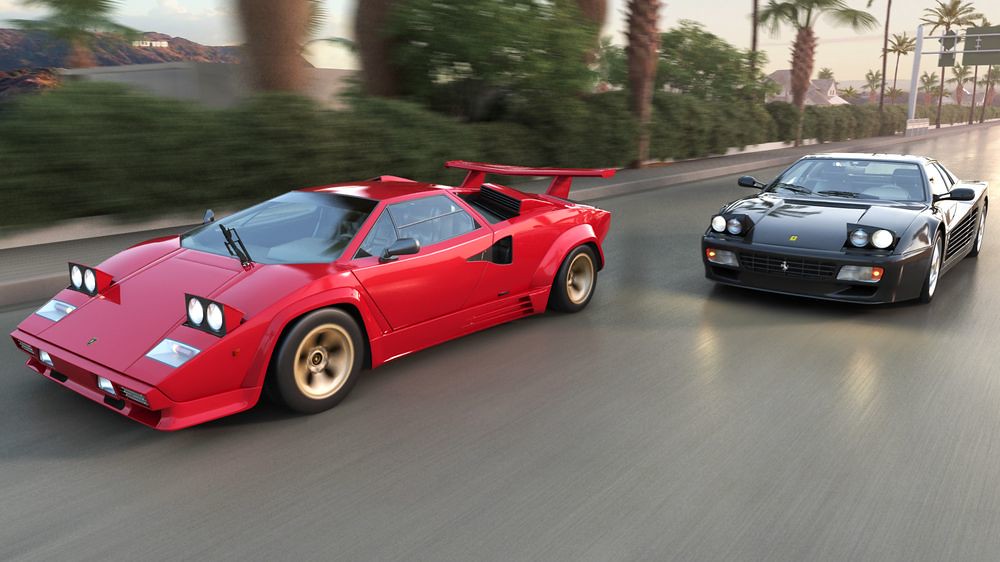
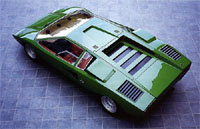
And here is the final 3D image:

This is how I did it.
The texturing process
Usually, before the texturing process, you need to model the car, but in this case, the cars were already done, as were the trees. I basically only made the road and pavement shape, which is quite basic.
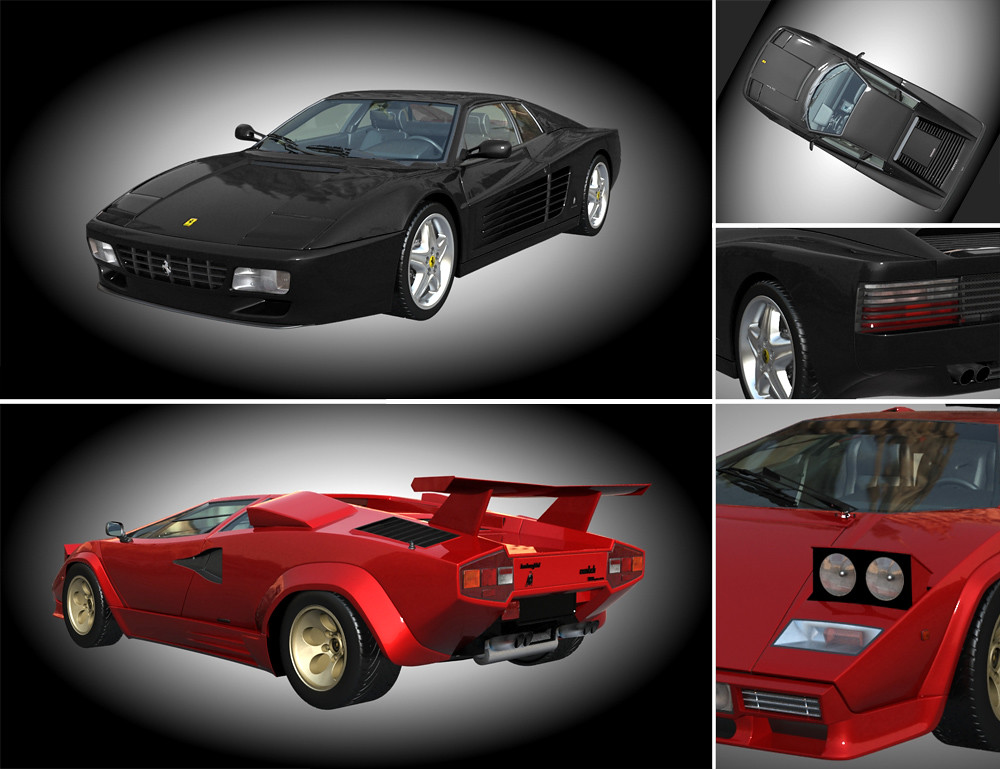
It all starts with the cars, really. They were already modeled, but needed texture. Here is a preview of the first step of draft texturing. You select which part is going to be glass, which is going to be the body, etc. This image is a basic render without any lighting, no ground, nothing— just an environnment map to see the reflection on the different material, and to see if it’s convincing enough to continue:
Then comes the scene, and here a screenshot of the workspace. I took the same view from the picture, with a more closed lens, maybe less dynamic than the original one, but also less distortion on the cars. I kept the idea of having the edge all along the road, with palms. Below, you can see transparent boxes, it contains the trees, showed that way not to be too heavy on the computer display:

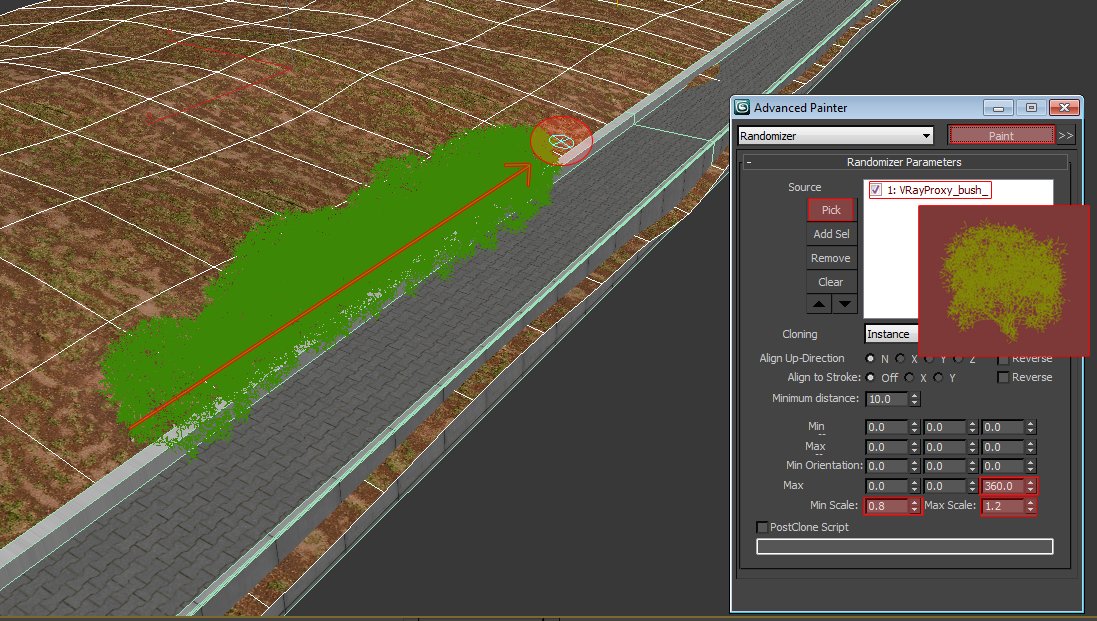
Basically, because you work in three dimensions, you can move objects along the X, Y, and Z axes, and this way position objects (in this case trees) wherever you want. But you also have tools to help you do that. In this picture, I “painted” one bush all along the road, with a a tool called Advanced Painter to randomize the position, rotation, and scale to make it look more natural. The rest of the palms and trees are placed manually since there’s a lot fewer of them:
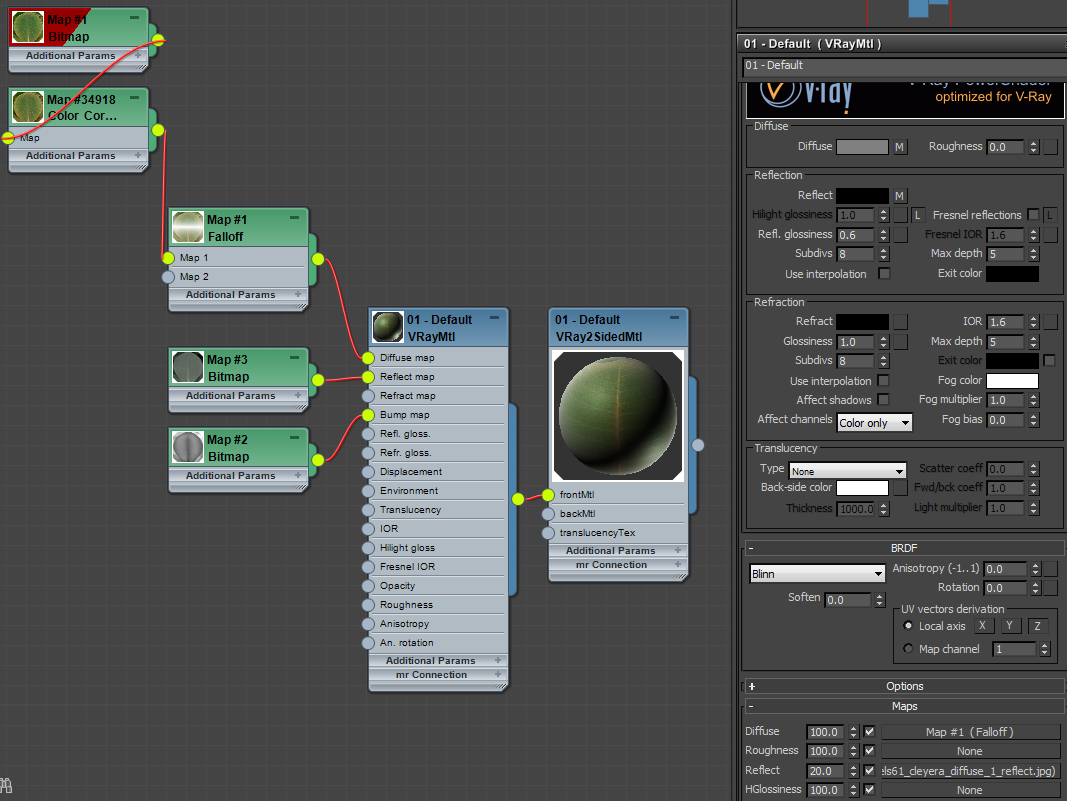
Here you can see the material editor. For every texture – materials in the scene – you see it first on a sphere to help you setup the right material. To make it look like metal, wood, or a wet road (or here, bush leaves), you add a JPG image into the “diffuse map”: that’s what you’re going to see in the render. Then you need to tell how it’s going to reflect, and/or refract, if you’re going to have “bump” on it, etc.:
The lighting process
Matching a real picture with the same lighting is very difficult, so I went on my own here, making a low sun orange, and using a picture of a sun rise to set the tones of the render. The background image is added onto a curved plan and doesn’t generate any light; it’s just here for visual purposes. You could add it after in Photoshop, but with the motion blur on the trees, let’s say it’s complicated to make it clean. I found a random image on the Internet showing the famous Hollywood sign. I flipped it to match the lighting, cloned it to extend it, and there you go:


The rendering process
In order to get the motion blur correct, you have to animate the cars and the camera as it would be in real life. So, making the cars in motion in the scene, making the wheels spin, and the camera to follow all that. Just a little detail that you barely see: I set the 512TR slightly slower than the Countach. This way it’s a bit blurry, like the actual photo. I’m not sure the picture here is very clear to understand! I hope it makes more sense once you’ve read the text…

So now, everything is ready! The sun is set, the camera and motion are too, and we just need some last bit of tweaking to send the final render. Here are a few tests showing the different stages. From finding the right HDR for the correct reflection on the cars to the blur effect, more or less intense…

Without any background yet to make the render time faster for the previews:
Post-production (or, Photoshop pour les intimes)
Along with the render, you can render other “passes”, such as the “reflection map”, the “Z depth” and much more…
It helps you to tweak the final render in Photoshop, adding more or less reflection, and other effects to make the image prettier. In this particular case, the render is pretty close to the final image, and it won’t need much work in Photoshop:

I just applied basic levels & contrast. The main thing then was to sort the fog in the background:
I used the “Z depth pass” to make it deeper where the light comes from. See the passes below that came with the render:

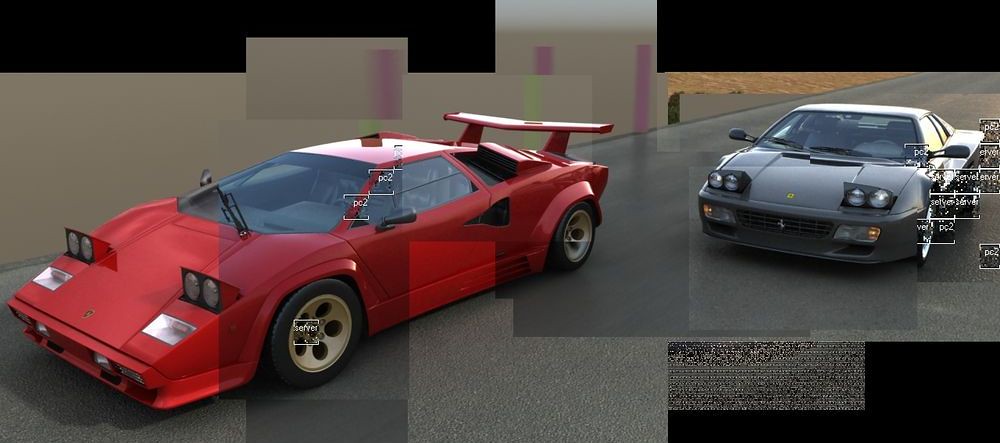
To help you see the difference of the post-production result clearly, here is a map of all the changes applied during the work in Photoshop:

And the final image, with drivers added discreetly, along with some glow effect for the lights from the picture above, slight vignetting, and color distortion to make it real 🙂

And the original picture again, for comparison:

We hope you found this tutorial on 3D rendering as fascinating and informative as we did! Special thanks to Ben for the tutorial —Ed. 
Words and images © Ben O’Bro
Original photograph © Motor Trend
See more of Ben’s work at benobro.org.


Fascinating! The 3D version almost looks more “real” than the original photo!
Automobiliac said this on February 8, 2013 at 12:08 am
Very good, time well spent.
Mart Dawson said this on February 8, 2013 at 3:06 am
That is insane!!!! I hope Ben doesn’t mind us using this as a wallpaper…….they happen to be two of my dream cars! Great Work Ben!!!
Todd said this on February 8, 2013 at 7:53 am
Unbelievable! So cool!
Alex said this on February 8, 2013 at 10:24 am
very impressive but i prefer the original photo
too real is the same as not real
🙂
wm said this on February 9, 2013 at 5:21 pm
[…] very cool CGI render brought to you by MCB contributor, Caterham owner, and visual artist extraordinaire Ben O’Bro — see more of Ben’s work […]
Season’s Greetings from Motoring Con Brio | . . . said this on December 24, 2013 at 12:01 am